
Waldorfish Blog
Portrait of the Annapurna Woman
I was so, so honoured when the soulful ladies at Annapurna Living asked to interview me for their Portrait of the Annapurna Woman feature - "an ongoing series featuring divine women who embody the nurturing spirit of Annapurna Living." I am ever grateful for their spirit, their purpose, and their willingness to keep showing up with the work they are doing! You can read the interview here.

The Mother magazine...
Kind of fun to find this in the mail this morning! My preview copy of the Feb/March 2015 issue of The Mother magazine arrived, featuring one of my illustrations :) It is paired with a beautiful read-aloud meditation for children, written by Christiane Kerr from Calm For Kids.


The Journey of Analise: A Child's Journey Through the Temperaments.
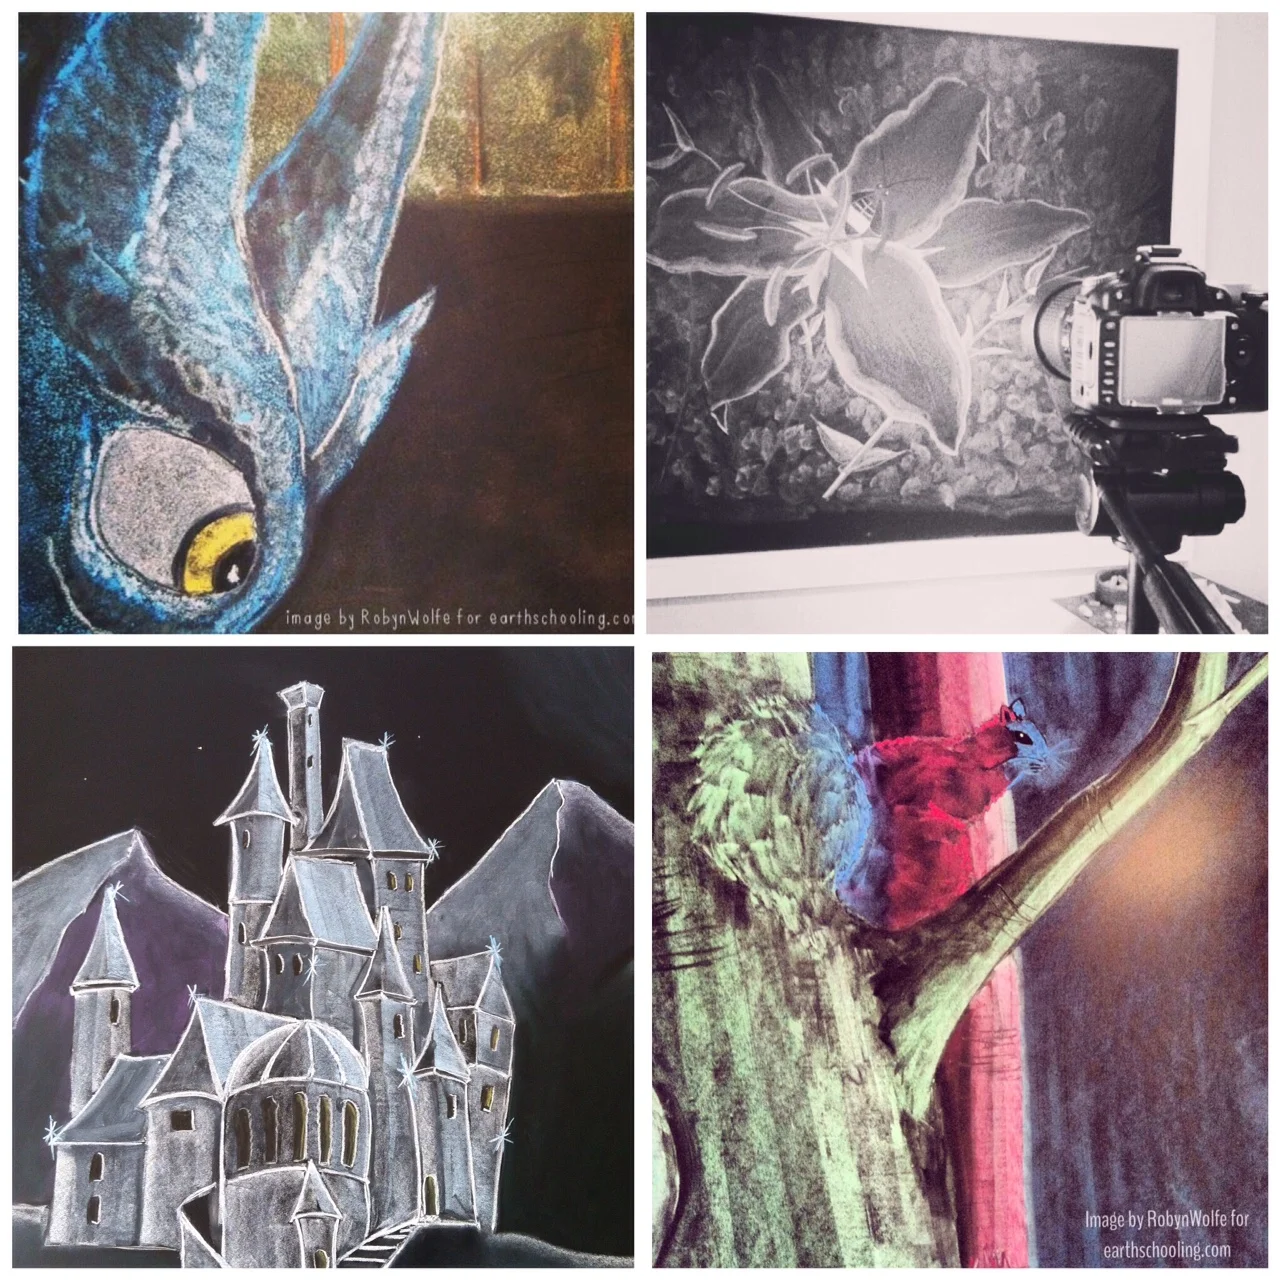
I'm beyond excited to tell you that The Journey of Analise is now in PRINT and available for purchase!! I spent a good part of last year working on the 12 chalk drawings which are now featured as the illustrations for this beautiful story written by author Kristie Burns.
At the moment it is part of a package which includes a 90-minute instructional chalk drawing video and an e-book with step-by-step instructions for creating all twelve chalk drawings in the book.
This book is unusual in that it is a full color picture book but also a 166 page chapter-book. The story of Analise's journey through the temperaments is told in twenty-six chapters. It can be read independently by a child or it can be read out loud in daily increments. It would be the PERFECT story to read during Advent....one chapter a day.
-Robyn

Waldorf chalk-drawing (photo) tutorial
I was finishing up my plans today, for a storytelling video I'm working on for the BEarth Institute. It occurred to me that I should probably have a relevant chalk drawing behind me in the background while filming... but of course I didn't think of this 3 days ago when I had all the time in the world to draw it.
Needing something "easy" that my brain already has a template for, I opted to recreate a drawing I did when my former class was in the 6th grade. The original version of this particular drawing has been floating around out there in the internet for a few years now, and I often get questions about how it came together on the board. At the time, I didn't think to take pictures of the original work in progress, but I grabbed my camera today. My hope is that having a visual record of this process will be useful to you! Here we go.....
Humble beginnings....a simple wash with orange and then some dark blue layered over the top section. Not thinking too much here....just spreading the colour around.

Starting with the background....clouds. Trying to bring in the colors of the night sky, along with some shadows & depth, aided by black chalk. Love black chalk! The story I'm pairing this drawing with comes from the very beginning of Roman History... it is here in the curriculum that the stories we tell begin to transition from stories to "real", recorded history. We leave behind the mystery, and start looking towards the concrete.

Full moon, partially obscured by the clouds. Tucking the moon behind another part of the background layer helps continue adding depth and interest. More black chalk used.

Beginning to think about the middle ground now. Added a couple of islands sinking into the ocean at the horizon line to add more visual interest. Used white chalk to show moon light/highlights on the sides where it would naturally be brightest (ask yourself - where is the light in my drawing coming from?) And of course, more black chalk ;)

Light blue wash. Layer it right over the orange...it's nighttime, it's dark, and water hardly ever looks blue in real life anyway.

Moving to the foreground. More white for highlights, and black to emphasize where things overlap + shadows.

At this point I stepped back and realized I was neglecting the right side of my drawing. I'm saving room in the middle of the ocean for the boat, but when I stood back I could see that there was room for a couple of middle ground rocks. I intentionally drew the blue one so that it crosses over the horizon line. Again, visual interest....it helps to break up that line a bit.

Speaking of boats....
(Notice that the ship also crosses the horizon line....)

....yes, this isn't a completely accurate representation of a Roman ship. During our second Roman History block, later in the year, we got into vivid stories involving the newly formed Roman navy & their spectacular ships. However, I figured this was safe for the first block. (For the second block, I did a chalk drawing of Hannibal crossing the Alps).


Look back at the last image, and then at this one. In the previous image, the boat sort of looks like it's in the water....but in this drawing, it really looks like it's IN the water, yes? Using white chalk to highlight the tops of the waves as well as the water right around the boat itself helps to "ground" the boat. This same principle is true when drawing trees, or anything resting on the ground, really. Adding some small plant or grass details around the base of a tree, really helps to solidify its' place in the drawing.
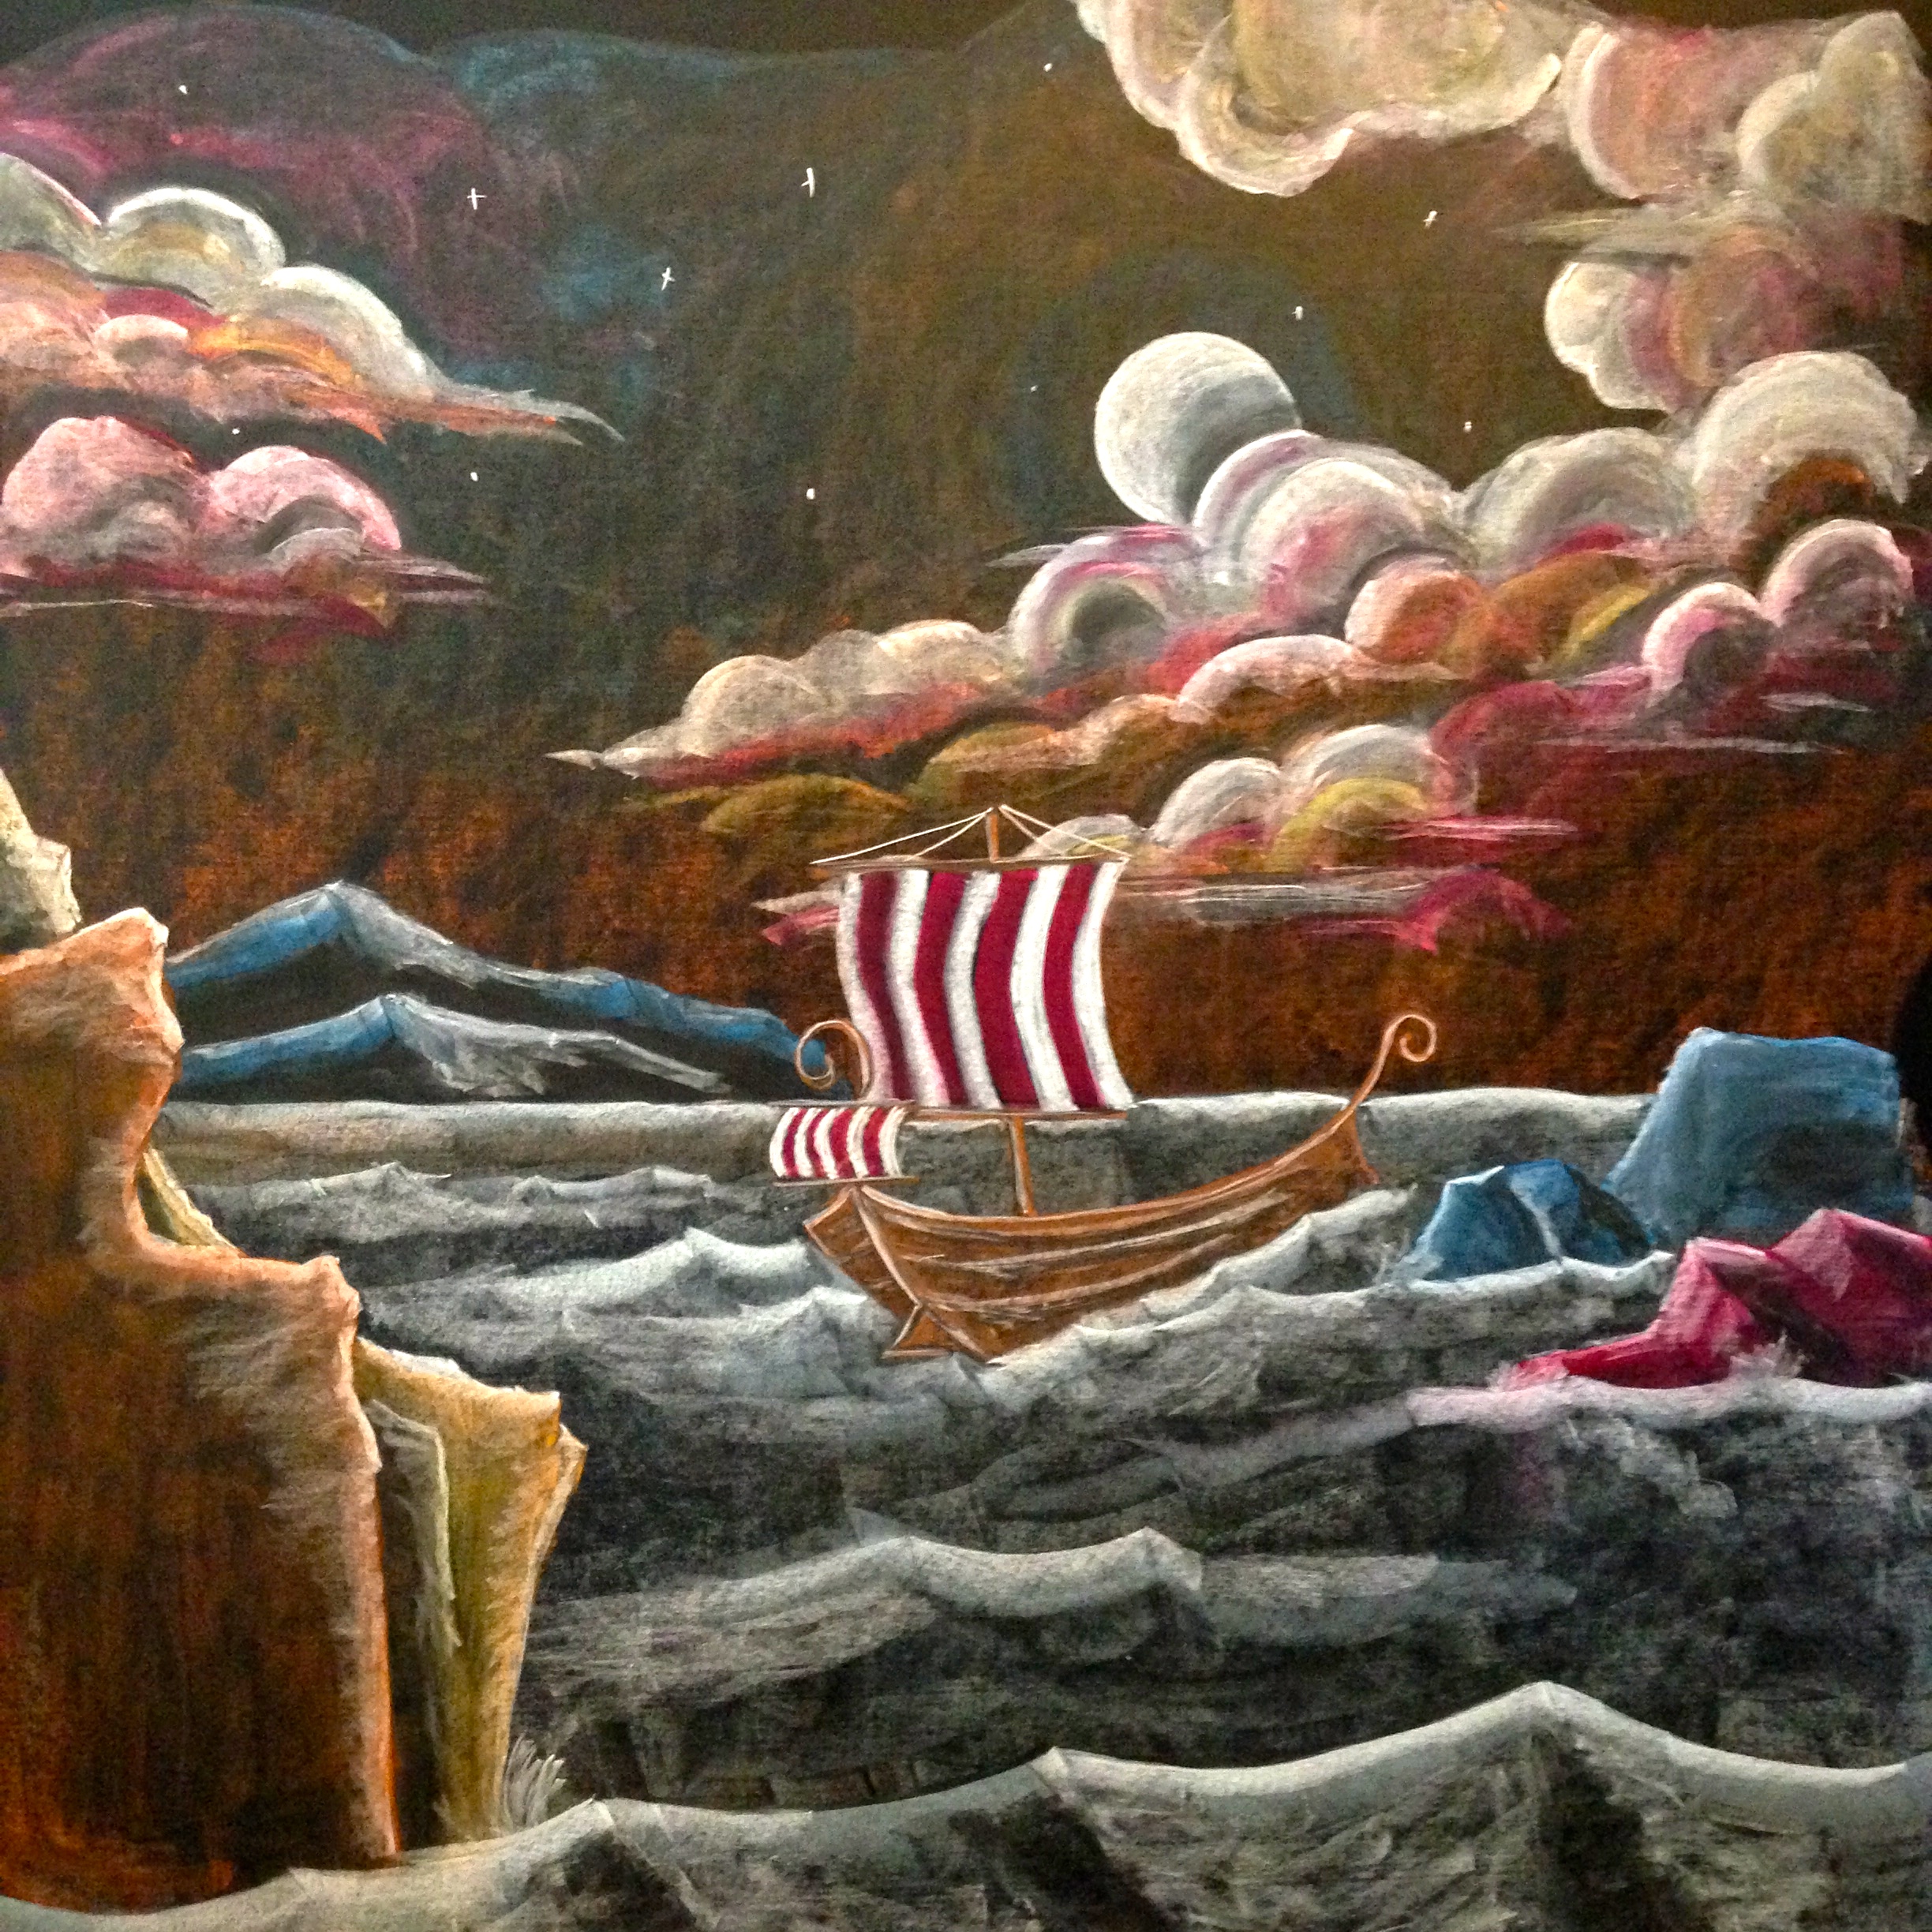
All done! As an afterthought, I added a bit of the moon's reflection in the water, behind the boat.

I hope this is helpful!
We offer a variety of other (video) tutorials. Take a look at the options, here!
Looking for something?
Welcome to Waldorfish! We started this adventure in 2012 out of a desire to make Waldorf training more accessible to class teachers in remote locations and to homeschooling families everywhere! Read more, click here.


WE WON! Our Weekly Art courses were voted “best interactive art program.” Learn more about the award, here.


Click here for a full list of schools we work with.
A few of our most popular blog posts:

Who are our courses for?

Starting Waldorf First Grade
4 Things to Know Before Planning Your Homeschool Year

In Praise of Balance: A Healthy Festival Life
Science in Waldorf Middle School: Starting Something New!